Hexo+Github搭建博客
今天教大家搭建免费的个人博客,注意是免费!免费!免费!
一、博客展示
博客地址:https://1902756969.github.io/Hexo/

二、注册、下载与安装
【1】github注册
github地址:https://github.com/
注册,注意是英文,因为是外链所以给大家推荐一款代理加速(不是翻墙)软件
FastGithub.UI:https://cloud.tsinghua.edu.cn/d/df482a15afb64dfeaff8/files/?p=%2Ffastgithub_win-x64.zip

【2】Typora下载
【下载地址】:https://www.typora.io/
链接:https://pan.baidu.com/s/1qNAbiNLgavwvvc08MCLJNA?pwd=0lvz
提取码:0lvz
【3】node安装
【下载地址】:https://nodejs.org/zh-cn/
【安装过程】:选择磁盘可以切换到其他盘,然后一直下一步就好了。
【4】git安装
上面三款软件安装建议不要默认路径
三、创建本地博客文件夹
hexo-cli安装
选择安装位置,打开cmd窗口
2
3
4
5
6
7
8
9npm install hexo-cli -g
或
先安装cnpm,然后利用cnpm安装hexo-cli
npm install cnpm
cnpm install hexo-cli -g
初始化hexo项目
hexo init blog
项目启动
hexo三件套:
-清除静态资源
hexo clean
-构建生成的页面相关内容
hexo g
-项目启动
hexo s
四、添加主题以hexo-theme-fluid主题为例
在blog\themes目录下
有了FastGithub可以从github下载最新最好的资源
npm install --save hexo-theme-fluid
https://github.com/fluid-dev/hexo-theme-fluid/releases
也可以进去下载资源包放进blog\themes
修改blog/_conf.yml
找到theme,替换为对应下载主题名字(在themes下载下来的文件夹名)
theme: hexo-theme-fluid
修改为主题语言为中文
在blog目录下的_conf.yml,找到文件内容里的language替换为以下
language: zh-CN #指定语言,会影响主题显示的语言,按需修改
生成about页面
在blog路径下,执行指令(管理员cmd操作)
hexo new page about
创建成功后,去到blog\source\about\index.md,添加layout属性,以为为index.md里所有内容
title: about
date: 2021-10-01 14:53:12
layout: about
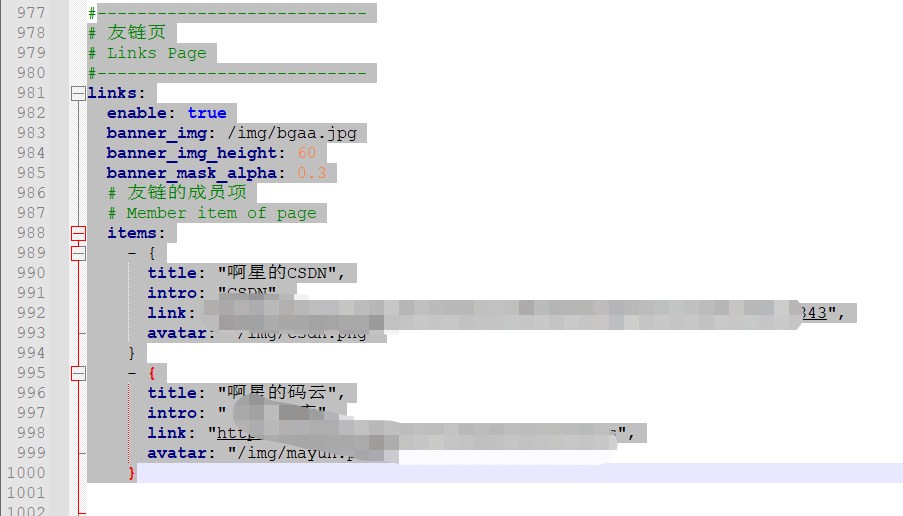
添加友链导航
在D:\hexo\blog\themes\hexo-theme-fluid \ __config.yml下找到这里

1 | |
其他的背景图头像什么的都在这个文件里面。可以自己修改
.md文件博客上传
可以直接在blog目录下,执行以下指令生成.md,再进行对该.md进行完善内容。
1 | |
这时候就生成在blog\source \ _posts
注意:所有的文章都在blog\source \ _posts
在.md文件里面加入
1 | |
宠物插件
npm install –save hexo-helper-live2d
或
cnpm install –save hexo-helper-live2d1、cnpm install –save hexo-helper-live2d
2、live2d插件
3、安装合适的宠物cnpm install live2d-widget-model-chitose
4、在博客_config.yml配置文件中(不是themes里的)添加即可
本地博客创建完成了!
我们要上传到github
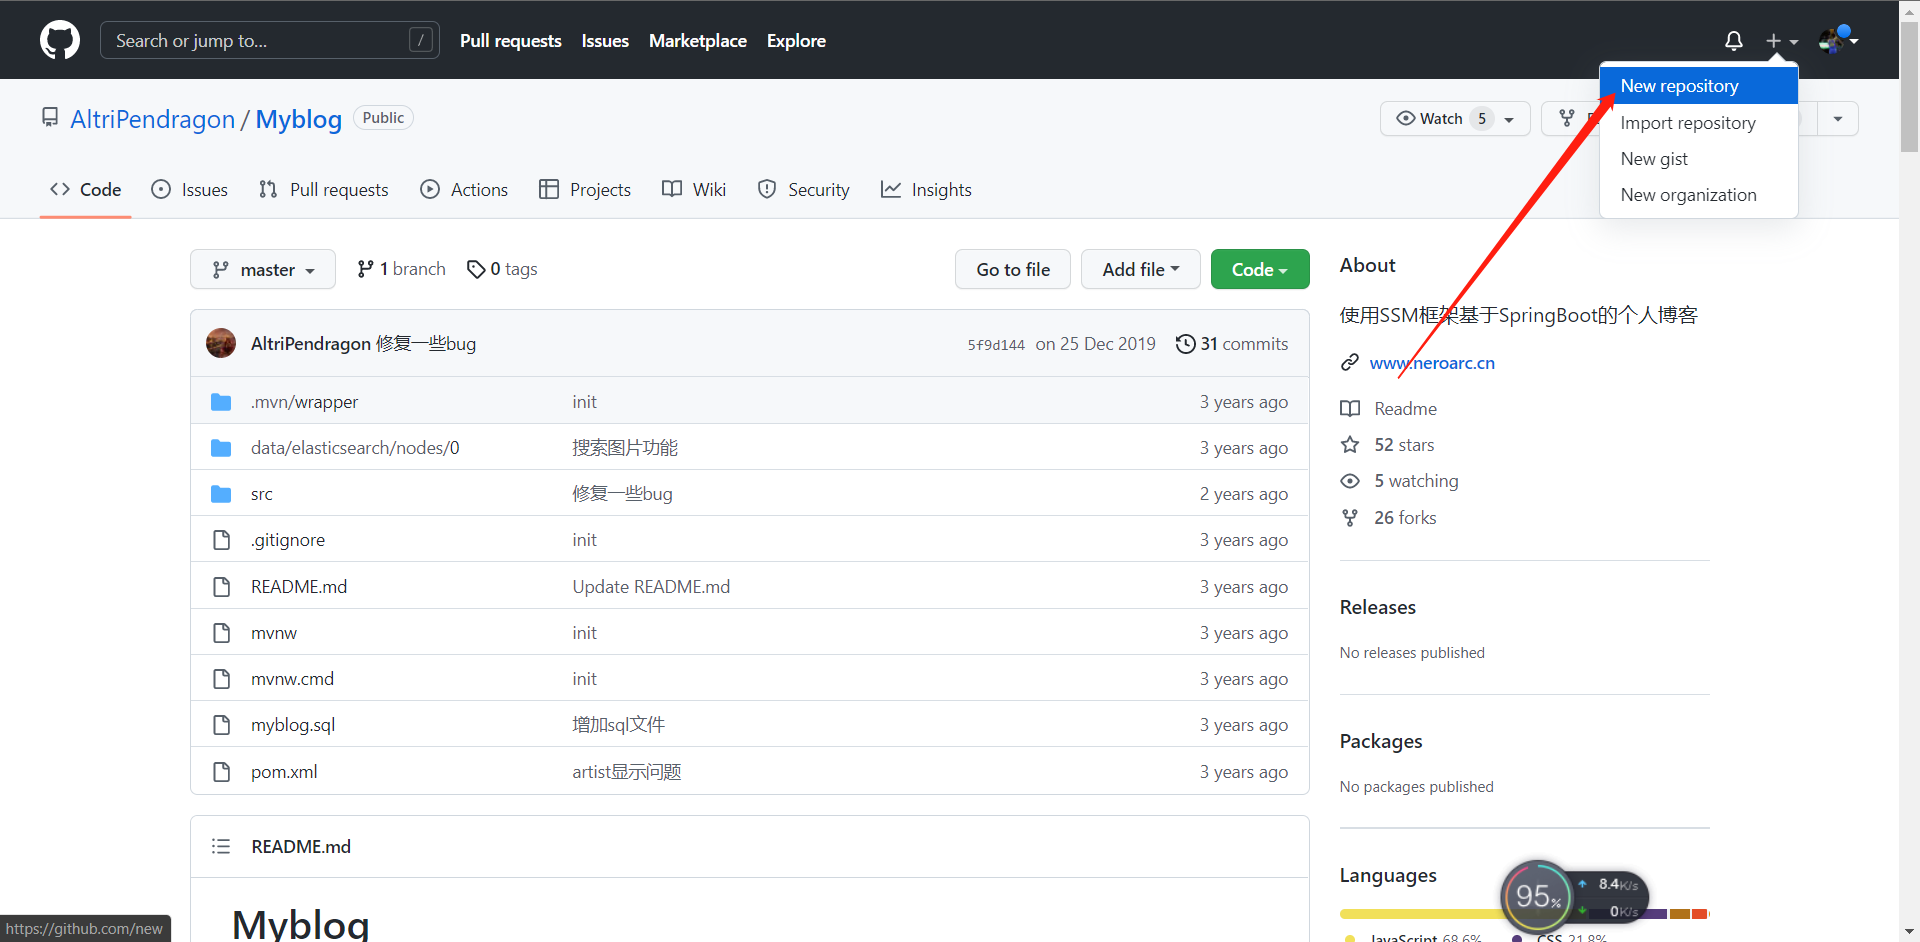
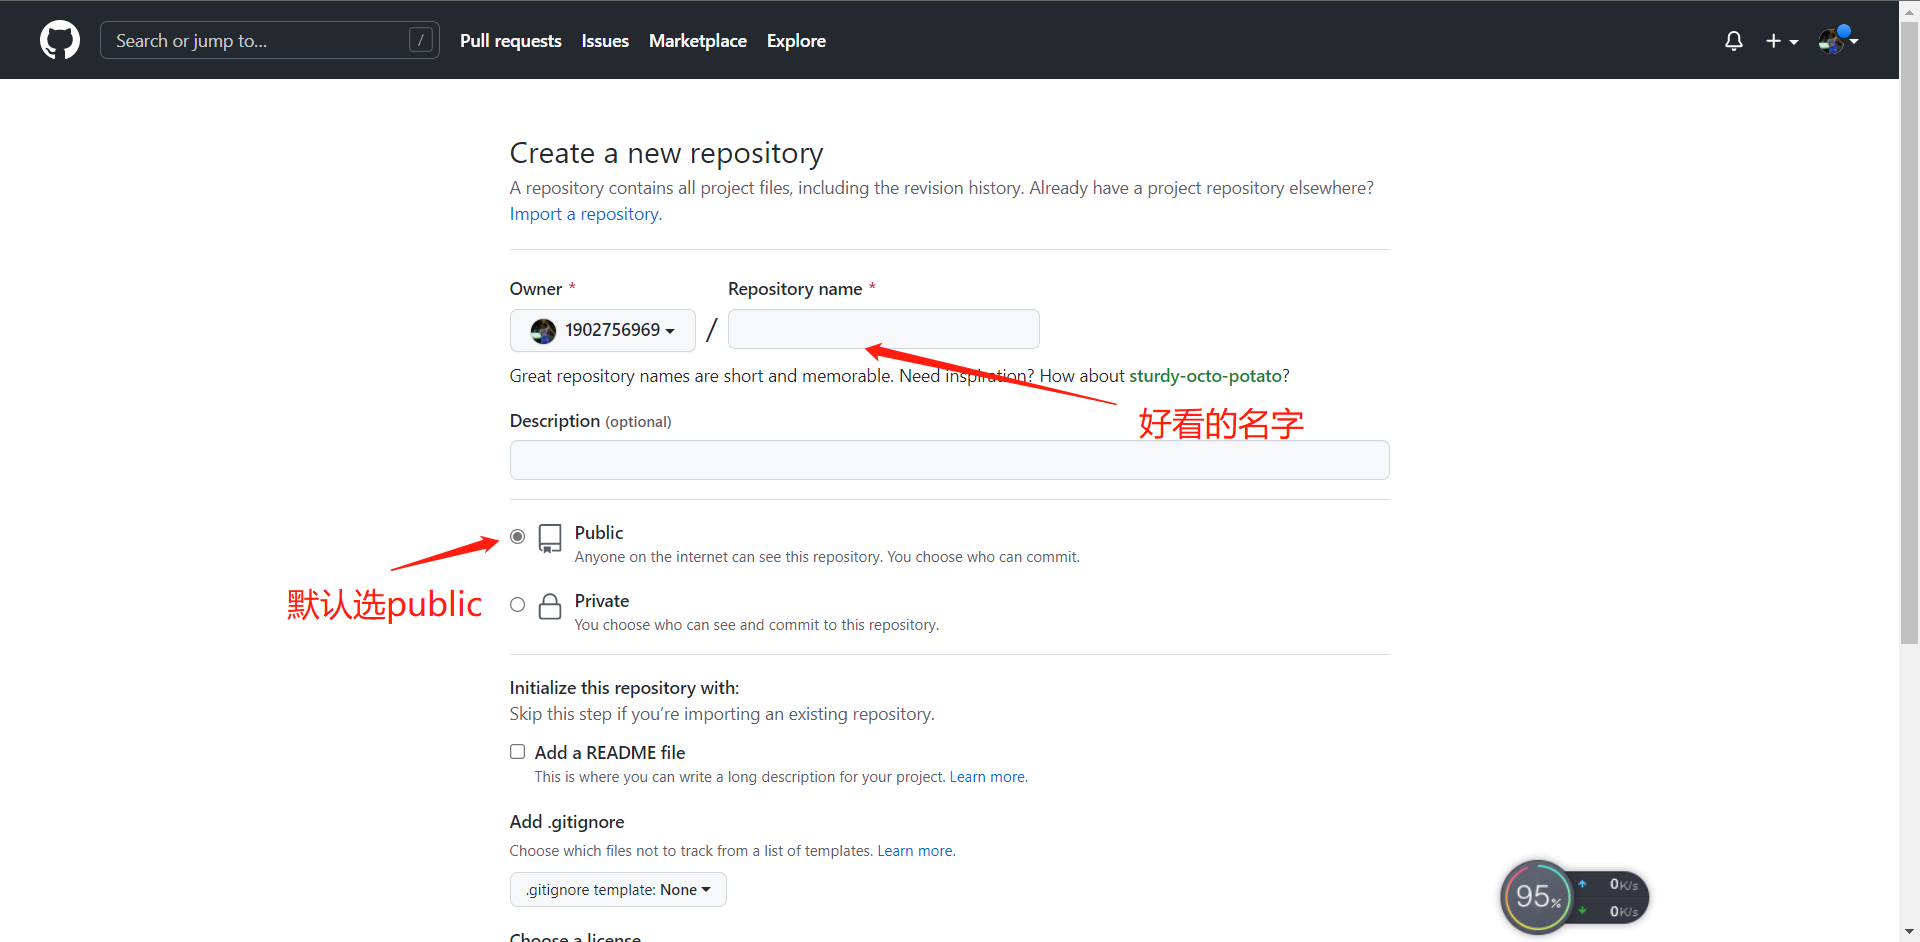
五、创建github仓库
看图操作


创建ok后进入账号设置

设置密钥

创建新的密钥

找到本地C:\Users\admin \ .ssh\id_rsa.pub上的密钥复制过去
提交搭建的博客到Github上,正式完成!
在blog \ _ config.yml
1 | |
安装git上传助手(如果有git设置过有帐号密码,就去先对git进行操作)
npm install hexo-deployer-git –save或
cnpm install hexo-deployer-git –save完成后,输入
hexo d
git的操作
查看配置信息:
$ git config –list修改用户名
git config –global user.name “xxxx(新的用户名)”修改密码
git config –global user.password “xxxx(新的密码)”修改邮箱
git config –global user.email “[xxxx@xxx.com](mailto:xxxx@xxx.com)(新的邮箱)”清除掉缓存在git中的用户名和密码
git credential-manager uninstall